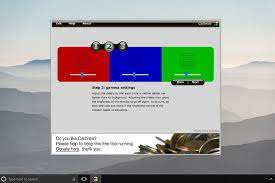
Monitor calibration is the process where the monitor is adjusted by changing its parameters such as Display gamma, White Point, Color Profile, Luminance, and other parameters that bring life to the display screen. Over time, the quality of the picture you see on the monitor looks washed out or may look too bright. This is the time when you should consider upgrading your monitor by calibrating it.
You can either make it done by a professional or do it yourself to the monitors that come with new technologies like UHD resolution, 4K display, HDR, etc. But now, the latest high-end monitors for AutoCAD, Gaming, and designing are equipped with new and advanced technologies, and hence you no need to calibrate them anytime as they are already calibrated.
But, if you own an older version, you might have to do a little calibration exercise. But, don’t panic; it’s hell easy if you follow the right steps. In this article, you will see a step-by-step guide to calibrating the monitor. After which the display on your screen would look as good as a new monitor’s screen.
How To Use The Calibration Tool On Your Dedicated Os?
Are you confused about how to use the calibration tool on your dedicated OS?
Don’t be. Just follow as I say.
You can do the calibration manually anytime you want, but the result can’t predict to be competent or consistent. Therefore, I recommend using specialized software to calibrate your monitor. Monitor calibration is done using either a spectrophotometer or colorimeter, pre-included in the software you would be using. You simply need to connect the tool to your computer via USB. The calibration device does the rest.
To make it much simpler, I have jotted down some points;
Step 1: Keep your monitor on prior 30 minutes before the calibration process so that it reaches up to its normal operating conditions.
Step 2: Set the monitor resolution to standard, i.e., default screen resolution.
Step 3: Keep the room lighting moderate where you would be performing the calibration process. The room shouldn’t be too dark or too bright. Keep the right amount of light.
Step 4: Based on your desktop screen laptop screen, reset all the settings to default. Now, install the software you wish to use for calibration.
Windows and Mac have built-in calibration tools. These tools are free to access, so if you are running low on your budget and cannot buy high-end software, you can use them.
How to use the Calibration Tool in Windows OS?
In the latest version of the Windows monitor, the tool can easily be located and performed.
- In the windows 10 models, you need to type color calibration in the windows search bar. The result would pop up. In the older versions, you will find this tool in Display settings under the Control Panel.
- Once you click on the tool, follow the on-screen instructions for color balance settings, contrast, brightness, and others.
- Once the calibration settings are set, save it by clicking current calibration. If you are not satisfied with the result, go again to the previous calibration and repeat the process until you get the desired result.
- The changes will be stored as a .ics file and shown as a new International Color Consortium(ICC) profile in the Color Management Setting App.
How to use the Calibration Tool in Mac Os?
- In the latest Mac OS models, the Display Calibrator Assistant is located under the display tab in the Color Section. If you still could not find it, try to search from Spotlight; it will lead you to the System Preferences Panel.
- Once you locate your calibrator, follow the on-screen instructions to choose calibrator White Point, Color Adjustments, Administrator Access.
- Once you are done with the settings, name the profile something you will remember for the next time.
- Then you will get a brand new color profile for your display. If you are not happy with the results, you can make adjustments again by clicking on the new profile and choosing Open Profile.
This is how you can calibrator your monitor using the built-in system tools. Now, if you want to try something else, you can go for online software or tools. Here’s namely a handful of online calibration tools which you will love.
The Lagom LCD Monitor Test Pages
- Caliber 2.0
- W4zt Screen Color Test
- Dry Creek Photo
If you are looking for colorimeter hardware, then I would suggest using;
- X-Rite ColorMunki Smile
- Spyder5Elite
Both these devices are highly effective and user-friendly. If you have a budget to go for upscale calibrators, then you can consider buying these colorimeters.
Conclusion
As long as you know how to calibrate your monitor, things will be simpler. You may not have to upgrade or change your monitor because of calibration issues. If you follow this step-by-step guide to calibrating the monitor, then you can quickly perform the process.


